
Fall in Love With This Russian Honey Cake Recipe
Some layered cakes look impressive until you take the first bite. Then they turn out dry, heavy, or way too sweet. This russian honey cake goes in a completely different direction.
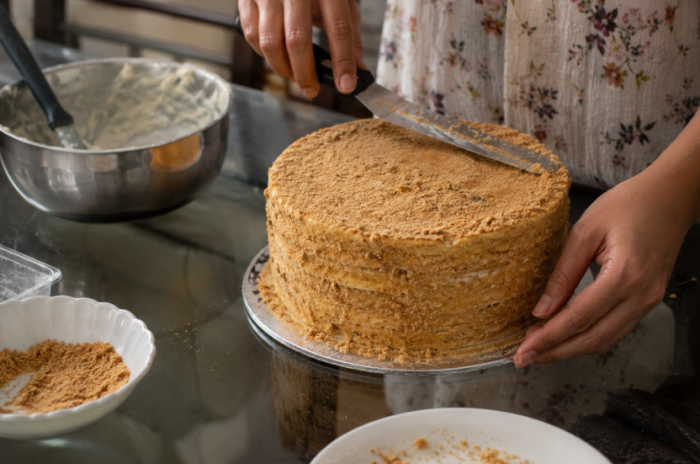
This classic honey russian cake, also called Medovik, is made with thin caramelised layers and a smooth cream filling that slowly softens the cake overnight. By the next day, every bite turns rich, soft, and full of flavour.
That is why people keep making this classic honey cake russian recipe again and again. Once you try it, regular layered cakes start feeling a little boring.
Before you begin, keep your cake tins and baking trays ready because you will be using them for every single layer.
What Makes Russian Honey Cake So Different?
Most layered cakes depend on thick sponge and heavy buttercream to stand out. This honey cake russian recipe takes a completely different approach, and that is what makes it so memorable.
Instead of thick cake layers, you roll the dough out thin like biscuits and bake each layer until lightly golden. Once you stack them with cream, the layers slowly soak everything up while resting in the fridge.
A few hours later, the whole russian honey cake turns soft, smooth, and full of flavour. The texture changes so much overnight that it almost feels like a different cake the next day.
And that chilling time? Do not skip it. That is where the real magic happens.
What You Need for the Cake Layers
One look at this russian cake recipe and you will notice how simple the ingredient list really is. No hard-to-find items, no complicated baking tricks, just classic ingredients working together in the right way.
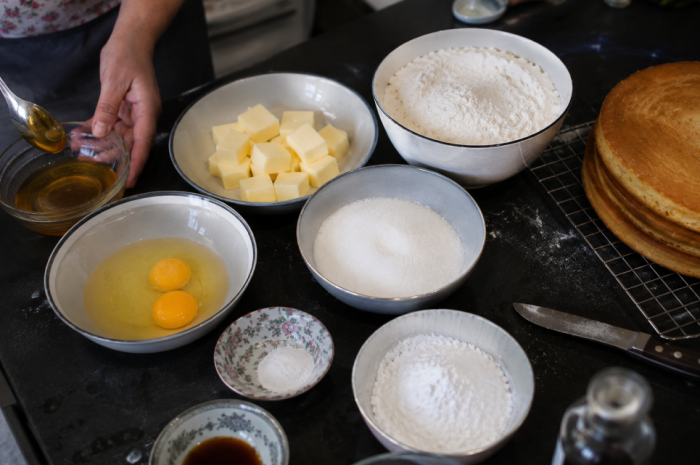
For the cake layers:
- 3 tablespoons clear honey
- 100g unsalted butter
- 150g caster sugar
- 2 large eggs
- 1 teaspoon bicarbonate of soda
- 350g plain flour
- 1 teaspoon pure vanilla extract
- 500ml soured cream (or mix of soured cream and double cream)
- 150g icing sugar
- 1 teaspoon vanilla extract
That is all it takes to make a soft layered honey cake with that classic creamy texture people love in a russian honey cake.
How to Make the Honey Layers?
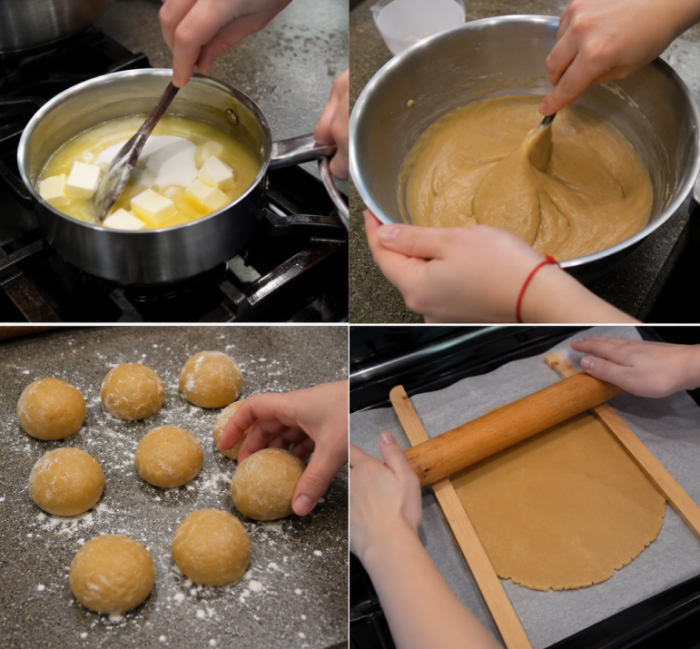
This is the stage where your russian honey cake starts getting its signature flavour. Add the butter, honey, and sugar to a pan and warm everything gently on low heat. Stir until the sugar melts, then let it lightly simmer for about two minutes.
Take the pan off the heat and leave it for around 15 minutes so it cools slightly. After that, whisk in the eggs one at a time, then mix in the bicarbonate of soda and vanilla extract.
Slowly add the flour until you get a soft, slightly sticky dough. Divide it into eight pieces and chill for 30 minutes.
Now preheat your oven to 180°C and roll each piece into a thin circle. A rolling pin with guides helps keep every layer even while stacking your honey russian cake. Bake each layer for 5 to 6 minutes until lightly golden, then trim while warm and save the extra crumbs.
Making the Cream Filling
This part comes together in minutes, but it is what gives your honey cake russian recipe that soft and creamy texture people love.
Just whisk the soured cream and icing sugar together until smooth and slightly thick. That is your filling ready to go. If you feel like changing the flavour or texture a little, you can also explore different options from the icings and fillings section.
Some people mix a spoon of honey into the cream for a stronger honey flavour through every layer of the russian honey cake.
Assembling Your Russian Honey Cake
Now comes the part where your russian honey cake finally starts looking like the real thing. Place the first layer onto a plate or cake board, then spread a thick layer of cream over it using a straight spatula palette knife. Keep going until all eight layers are stacked.
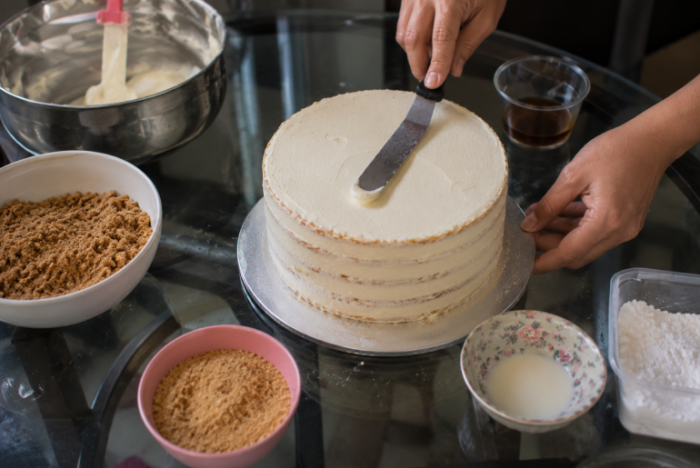
Spread the remaining cream over the top and sides, then smooth everything out with a cake scraper for a cleaner finish.
Next, crush those leftover cake trimmings into fine crumbs and press them around the outside of the cake. This gives the classic honey cake its soft textured look.
Small details on top can also make your homemade cake look much more polished. With the right piping supplies, simple swirls or borders can give your cake that bakery-style finish without making the decorating feel difficult.
The Most Important Step: Chilling Overnight
It is hard not to cut into your russian honey cake straight away after stacking all those layers. But this is the stage that changes everything.
Once the cake is assembled, place it in the fridge for at least six hours. Overnight works even better. While it chills, the cream slowly soaks into every layer and turns the whole cake soft and rich.
The next day, the texture feels completely different. That is why people say a proper honey russian cake always tastes better after resting overnight.
Small baking tips that make the layers turn out better
A little patience helps a lot while making this how to make russian honey cake recipe. Let the dough cool before adding the eggs because hot dough can cook them too quickly and ruin the texture.
While rolling the layers, try keeping each one close to the same thickness. This helps them bake evenly so your russian honey cake stacks neatly without some layers turning too crisp or too soft.
You can also mix a little double cream into the soured cream filling if you like a richer texture in your honey cake.
And while baking, having the right baking equipment nearby makes the whole process much easier and less messy from start to finish.
Worth Every Layer
Once you make this russian cake, you start understanding why people keep talking about it years later. It takes a little time, a bit of layering, and some patience in the fridge, but the final result feels far more special than the effort behind it.
Serve your russian honey cake cold the next day, add a little extra touch with simple Cake decorating, and watch what happens after the first bite. Most people stop mid-conversation just to ask you how you made i
Comments are closed here.