
How to Create a Wafer Paper Cake That Looks Like Edible Art
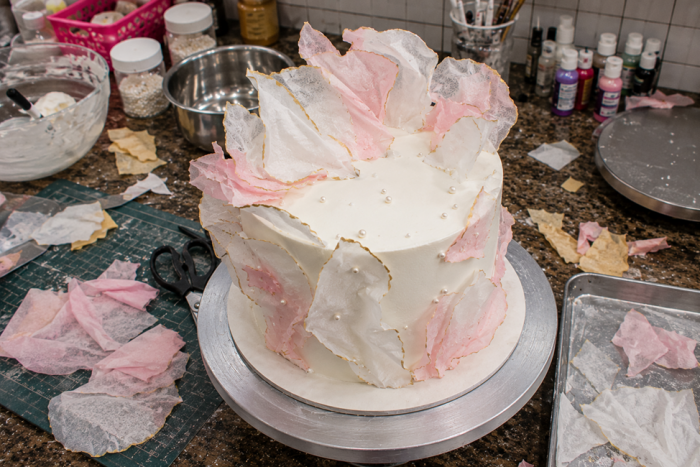
Before you know how it is made, a wafer paper cake can look more like a display piece than something you would actually eat.
The petals, sails, and textured shapes often seem far more complicated than they really are. In reality, many of these designs start with a single sheet of edible wafer paper and a little patience.
What Is Wafer Paper?
When people talk about wafer paper cake decorations, they are usually referring to decorations made from edible wafer paper.
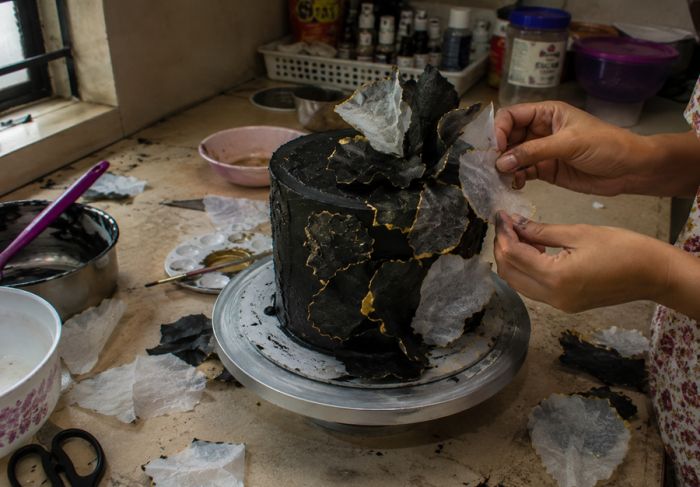
It is a thin edible sheet made from potato starch, water, and oil. It has very little flavour, so it is mainly used for decorating rather than adding taste.
Many people enjoy making wafer paper cake decorations because the material can be shaped in so many ways. You can paint it, fold it, curl the edges, layer pieces together, or cut it into petals and shapes.
Have you ever looked at wafer paper flowers and wondered how they were made? What eventually becomes a flower or decorative shape often starts as a single sheet of wafer paper. Once you begin cutting and shaping it, you can create a wide range of edible decorations for your cakes.
How to Colour Wafer Paper?
What starts as a plain white sheet can soon look completely different once colour is added.
That is why colouring wafer paper is often where the creative part begins. The colours you choose can change the whole feel of your decoration, whether you are making flowers, sails, or abstract shapes.
To get started, mix gel food colouring with a small amount of water until it has a paint-like consistency. Using a soft brush, apply the colour in light strokes across the surface. Try not to use too much liquid, as excess moisture can cause the paper to soften too much.
A gel food colouring set gives you plenty of shades to experiment with and a little colour usually goes a long way.
If you would like to add some extra detail, dust the dried surface with edible gold lustre dust. It can add subtle highlights.
How to Shape Wafer Paper?
Once you start shaping it, the wafer paper begins to look more like a decoration than a sheet.
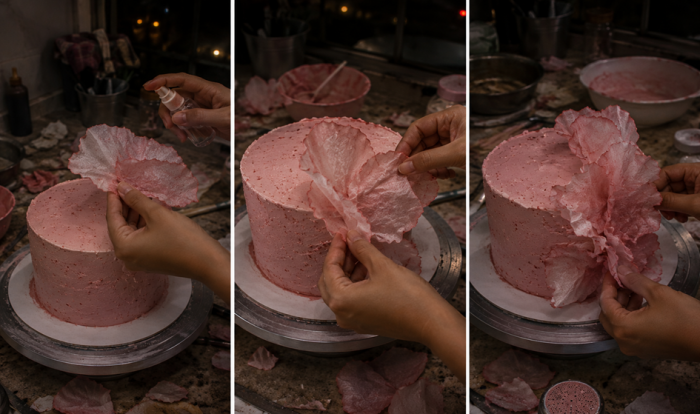
Once your wafer paper has dried, you can bend, curl, or shape it into different forms. To make this easier, use a light mist of wafer paper spray. A small amount is usually enough to soften the paper without making it difficult to handle.
After spraying, you have a few minutes to work with it. You can gently fold the edges, create curves, or press it into the shape you want. Hold or support the piece while it dries, and it will gradually firm up and keep its shape.
Wafer Paper Flowers
If you ask cake decorators which wafer paper project they make most often, wafer paper flowers would be high on the list.
They are a popular choice because you do not need lots of tools or complicated techniques to make them. Start by cutting petal shapes from coloured wafer paper. Lightly dampen the base of each petal, then use your fingers to give it a gentle curve before layering the petals together to build the flower.
You can keep the design simple with a few flowers or create a larger arrangement for an elegant wafer paper cake. You can also use edible floral wafer paper if you would prefer to start with pre-printed designs rather than colouring the paper yourself.
Wafer Paper Sails and Abstract Shapes
Flowers are not the only option when working with a wafer paper cake.
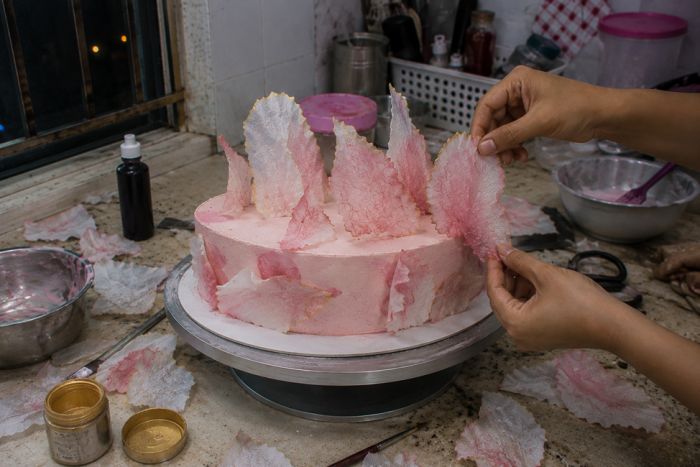
If you prefer a cleaner or more modern look, sails and abstract shapes are worth trying. All you need to do is cut the wafer paper into different shapes, add a little colour, and leave them to dry.
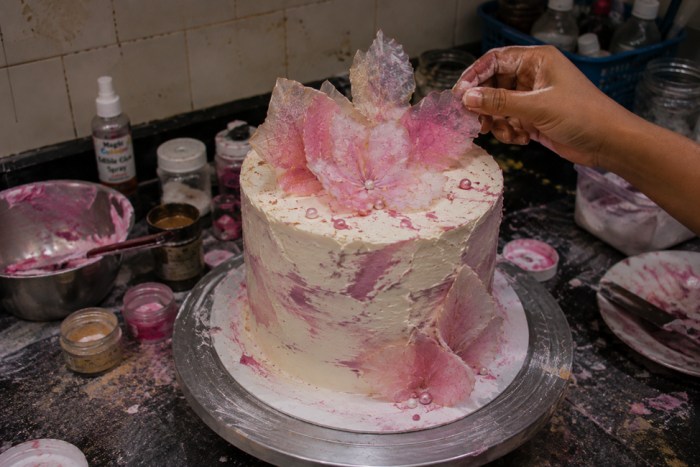
Add the pieces to the cake before they fully dry so you can still adjust their placement. Some people use one large sail, while others group several pieces together at different heights.
You can create a strong effect without filling the cake with lots of extra details. For larger decorations, a premium edible wafer paper can be useful as the sheets are a little firmer and hold their shape more easily.
The Best Way to Apply Wafer Paper to a Cake
Once your decorations are ready, you can start attaching them to the cake.
For flat pieces of wafer paper for cakes, place them onto chilled buttercream and gently smooth them with dry fingers. The buttercream helps keep the paper in place.
If you are adding taller edible decorations such as flowers or sails, a cocktail stick can help keep them in place once they are positioned on the cake.
Try to work on a chilled cake rather than a warm one. Cold buttercream holds the paper more securely and makes it easier to position your decorations where you want them.
The Finishing Details
Once your decorations are in place, you can add a few finishing details. If you want to add a little variation, try brushing edible lustre dust onto parts of the decoration. You can also sprinkle a small amount of edible glitter around the base of the cake or across selected areas.
These finishing touches only take a few minutes, but they can help bring all the different elements of your wafer paper cake together.
Tips Worth Knowing
Working with colouring wafer paper gets easier with practice, but a few simple habits can save you time.
- Let the paper dry fully before you start cutting or shaping it. If it is still damp, it can tear more easily and the edges may not look as clean.
- Try storing finished pieces somewhere cool and dry until you need them. Moisture in the air can affect the paper over time.
- Sharp scissors are also worth using, especially for petals and detailed shapes.
- One more tip: make a few extra pieces. Not every flower or sail will turn out the way you planned, and having spares gives you more options when decorating.
Do Not Be Surprised If People Think You Bought It
That is the funny thing about a wafer paper cake. You can spend an afternoon cutting, shaping, and colouring paper, and suddenly people start asking which professional made it.
Start with a simple sail. Make a few wafer paper flowers. Try different colours and shapes. There is no need to get everything right on the first attempt.
The more you work with edible wafer paper, the more ideas you will want to try.
And when someone looks at your cake and asks, you made that yourself?, you will know the extra effort was worth it.
Comments are closed here.