
How to Decorate a Cake with Stencils: Simple Techniques for Beginners
Want to make your cake look great without spending hours decorating it? That’s where cake stencils come in!
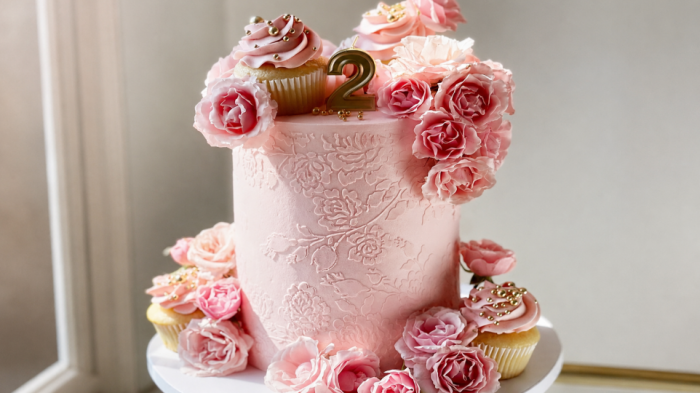
Once you know how to use a cake stencil, it honestly becomes your favourite cake decorating trick! No piping skills are required, or any special training. Just a stencil, something to apply and your cake is ready.
Whether you’re baking for the first time or you do it often, stencils make decorating simple and fun.
What Is Cake Stencils?
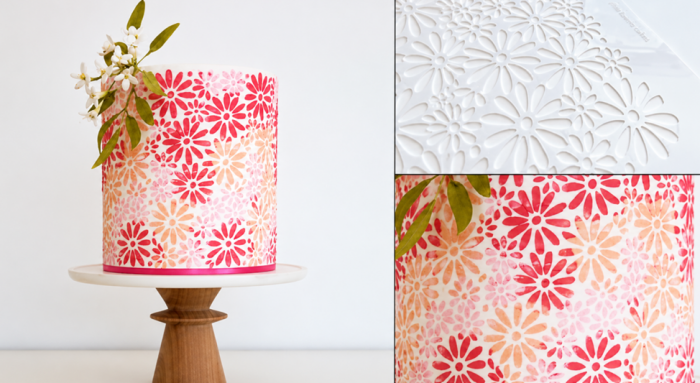
A cake stencils is a sheet of thin food-safe plastic with a pattern cut into it. You place the stencil on your frosted cake, spread or dust over it, then peel it away to reveal a clean, detailed pattern. Simple as that!
There are two main types. Side stencils wrap around the cake to cover the sides. Top stencils sit flat and are used for designs on the top. Both are easy to use and great for beginners once you try them once or twice.
What You Need to Get Started?
Good news, you don’t need many tools.
You probably already have most of them at home. The most important thing is not a tool. It is the temperature of your cake. A cold, firm surface is everything when it comes to getting a clean stencil result.
Before you start, keep these ready:
- A chilled cake. Keep it in the fridge for at least 30 minutes after frosting. Cold buttercream or fondant stays firm and gives the stencil a stable surface to sit on.
- An icing scraper or palette knife. A straight, firm edge helps you spread smoothly across the stencil and get a clean finish.
- Your medium. Use royal icing, buttercream, cocoa powder, icing sugar, or edible dust depending on the look you want.
- Tape or pins. Keeping the stencil completely still is critical. Even a tiny shift will blur the edges of your design.
A turntable. Not a must, but very helpful for working around the sides easily.
Royal Icing Stenciling
This is the most popular method and honestly, it gives the cleanest results.
If you want that sharp, professional look, this is it! On a fondant cake, the royal icing stencil sits perfectly and holds its shape so well. The final design looks neat, crisp and super impressive.
The process is straightforward:
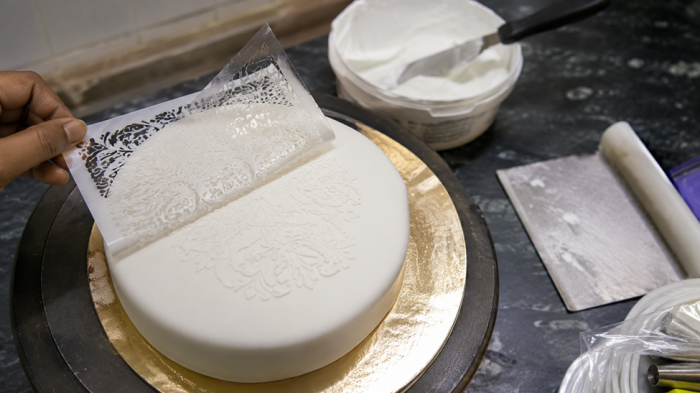
- Fix the stencil onto the cake with tape or a little shortening so it won’t move.
- Spread a thin even layer of royal icing with a palette knife.
- Scrape off the excess with one firm, confident stroke. The thinner the layer, the crisper the result.
- Slowly lift the stencil straight back, this step is key, so go gently.
And that’s it, your design is ready!
If you’ve ever wanted to create a piece of royal icing, the Eloise Wedding Stencil Collection is a great choice to start. This floral and scrollwork pattern makes it look like hours spent creating this design.
Buttercream Stenciling
Using cake stencils for buttercream feels a bit different, but it’s just as satisfying.
The one thing to remember? Your cake must be properly chilled. If the buttercream is soft, it will smear when you lift the stencil.
Once your cake is cold and firm, press the stencil flat. Spread a thin layer of contrasting buttercream, scrape once with confidence and then lift it away smoothly. That’s it. You’ll get a clean two-tone design that looks seriously impressive.
Seamless stencils work beautifully here since the pattern wraps around without any visible joins. The Lacupella Seamless Cake Stencil SUPREMA is a great example of exactly this kind of design.
Dusting with Icing Sugar or Cocoa Powder
This is the quickest method of all and honestly one of the most satisfying. An icing sugar stencil dusted over a dark chocolate cake takes about two minutes and looks absolutely beautiful. The same technique works with cocoa powder, edible glitter, or lustre dust for different effects throughout the year.
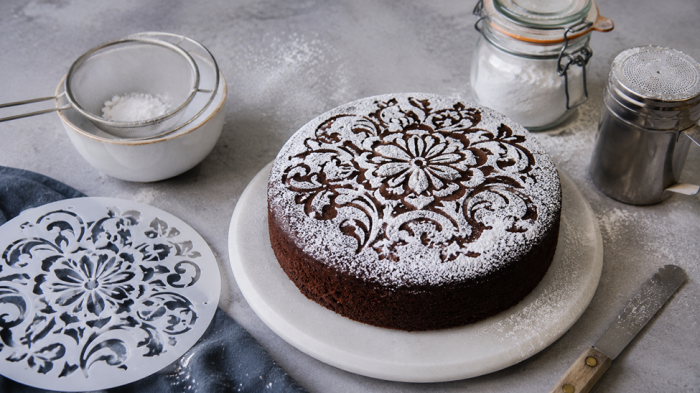
Want to try it? It really could not be simpler:
- Lay the stencil flat on the cake surface, pressing the edges down gently so nothing sneaks underneath.
- Sift your icing sugar or cocoa powder evenly over the top of the stencil.
- Lift the stencil straight up, keeping it level and the design is revealed underneath. Simple as that!
What Designs Are Available?
So many options to choose from and that’s where the fun really begins!
There’s a huge variety of icing stencils, so you can easily find something for any occasion, style, or skill level. It’s honestly hard to pick just one.
Some of the most loved styles include:
- Flower stencils are a lovely choice as they add soft and pretty details without any hand painting, perfect for fresh and light cake designs.
- Wedding stencils are very popular for their elegant lace and delicate patterns that make cakes look beautiful and special.
- Seamless pattern stencils are great when you want a continuous pattern all the way around a cake with no visible joins. The effect is really polished and professional.
Seasonal and themed stencils are perfect for celebrations like Christmas and birthdays, so you can match your cake to the occasion easily.
Tips for Getting It Right
Even simple stenciling can go wrong if small things are missed. But once you know these tips, getting clean results becomes much easier.
- Start with a well-chilled cake, because a cold surface keeps the design neat and stops the icing from smudging.
- Practice first. Try it on baking paper before using it on the cake. It only takes a minute and helps you feel more confident.
- Use one smooth scrape. Do not go back and forth, as it can push icing under the stencil and ruin the design.
- Clean the stencil after each use. Wash it with warm soapy water so the pattern stays clear and lasts longer for many future cakes too.
Fondant or Buttercream?
Not sure which one to choose? Both work, but they feel a little different.
- Cake decorating on fondant is easier for beginners. It is firm, so the stencil sits flat and gives clean, sharp designs. Royal icing on fondant looks especially neat.
- Buttercream needs more care because it must be well chilled. But once it is cold and firm, the results look just as good.
If you are starting out, fondant is the easier option.
When to Use Stencils?
When can you use stencils? Honestly, anytime! They work for birthdays, weddings, Christmas, baby showers and more.
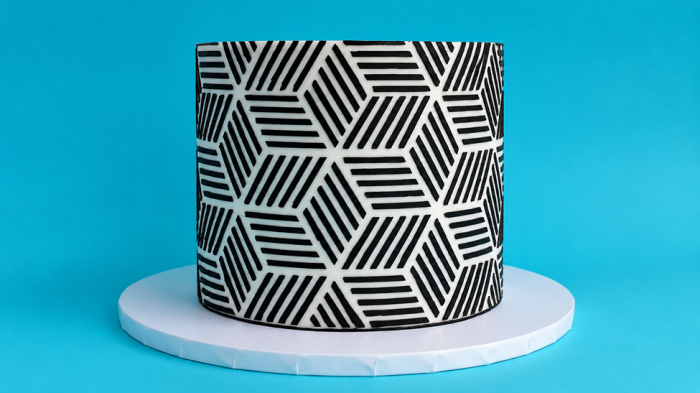
A quick icing sugar dusting can turn a plain cake into something that looks bakery-made. And if you go for a detailed royal icing stencil on a tiered wedding cake, your cake can look truly professional.
For special occasions, the Beatrice Cake Border Wedding Stencil is a beautiful choice. It creates a soft lace-style border that looks elegant without needing advanced skills.
Easier Than You Think
Still thinking it might be hard? It’s really not!
That’s why cake stencils are so magical! The results look detailed and skilled, but the process is simple and easy to learn. The moment you lift the stencil and see that clean design, you’ll be surprised how easy it was.
Start with something simple. Get comfortable with the technique. Then try something a little more detailed. Before long, cake decorating stencils will be one of your essential tools and every cake you bake will show it.
Comments are closed here.