
Thinking of Making a Drip Cake? Tips, Tricks and Products You Need
Have you noticed the beautiful drip cakes on social media and wanted to give them a try? You’re not the only one!
A drip cake is a very eye-catching cake design which you can make and the best part is that it is a lot easier to do than it looks. It is a versatile cake that can be used for birthdays, celebrations, or just to enjoy it fits in well with many different occasions.
From how to make the perfect white chocolate ganache to which chocolate drip products to use we have covered it all in this blog. Let’s get started!
What Exactly Is a Drip Cake?
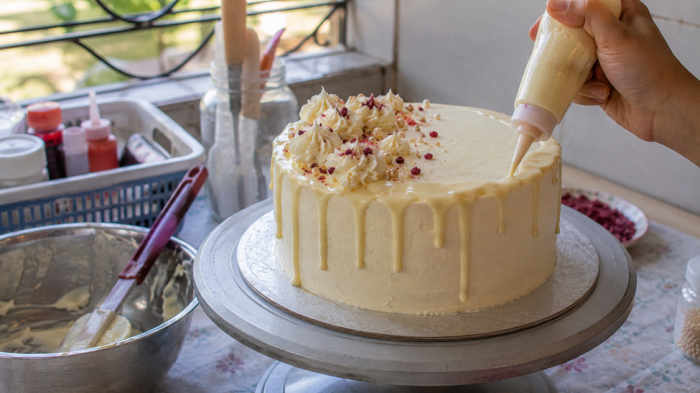
A drip cake is a cake that has frosting on it and chocolate or icing dripping down the sides. The chocolate or icing drip goes around the edge of the cake making really cool drops of different lengths. The cake looks great on its own. It looks even better when you put sprinkles or fruits or swirls of buttercream on top.
The best part? You do not have to be an expert to make one. With the right technique, the right consistency and a nicely chilled cake, you are all set. Chilling your cake is the most important step and it makes everything much easier!
What Do You Need Before You Start?
Getting everything before you start making the cake makes it a lot easier and less stressful.
Let us look at the things you need to have:
- A fully frosted and chilled cake (minimum 20 to 30 minutes in the fridge)
- Your chosen drip which can be ganache, ready-made drip icing, or candy melts
- A squeeze bottle or piping bag for control
A turntable to help you rotate your cake easily while working
How Do You Make a White Chocolate Drip?
Have you seen those simple and pretty white chocolate drip cakes?
There is a reason people love them. They look clean, take colour well and taste really good. To make white chocolate ganache, you only need two ingredients. The ratio is 3 parts white chocolate to 1 part double cream, unlike milk or dark chocolate which use a 1 to 1 ratio.
Let’s see how to make it:
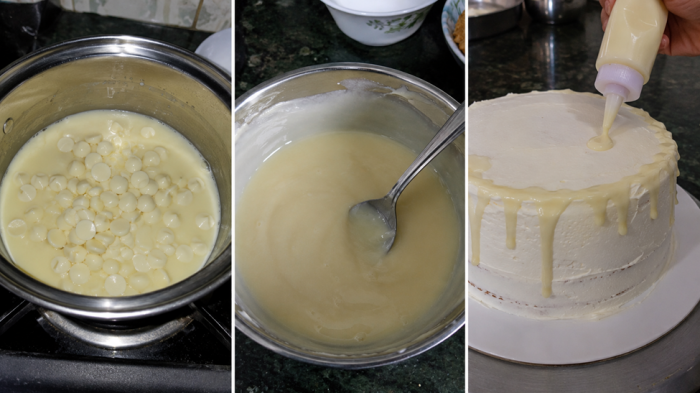
- Gently heat the double cream until it just begins to simmer
- Pour it over your white chocolate callets or chips and let it sit for one minute
- Stir slowly from the center outward until it becomes smooth and glossy.
- Allow it to cool to approximately 30 degrees Celsius prior to placing it on your cake.
If you want something even quicker, the FunCakes Choco Drip White Chocolate is also available in the ready-to-use version. Heat, shake and drizzle. A smooth white chocolate flavor that gets the job done on any iced cake.
Can You Make Drip Icing Without Cream?
Yes, and it works really well!
If you do not have cream at home, you can make drip icing using water instead. The ratio here is 6 parts chocolate to 1 part water. This gives a firmer set, which is ideal if you want crisp, defined drips.
To make drip icing: simply heat the water, melt your chocolate into it, stir well and let it cool down before applying the drip icing. Like with cream-based ganache, making sure your cake is cold before you drip the drip icing is essential. Warm ganache on a warm cake is a recipe for disaster when it comes to your drip icing.
Not a Fan of Chocolate? Try Candy Melts!
Candy melts are a great easy option for drip icing. They come in lots of colours, melt smoothly and set nicely on a cold cake. You can go for pastels, bold shades, or even metallic looks.
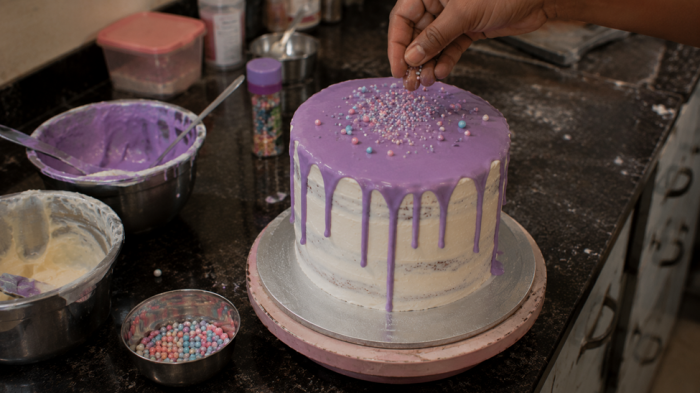
Just melt them in short bursts in the microwave and stir well. If they feel too thick, add a tiny bit of vegetable oil to loosen them up for better drips.
If you love soft colours, the SuperDrip pastel colour set is a lovely choice. It comes with ready-to-use shades, perfect for spring cakes and rainbow designs!
Want the Easiest Option? Use a Ready-Made Drip
If you are not in the mood to measure and mix, pre-made chocolate drip cake products are a total game changer. Just microwave the bottle, shake it up and squeeze it straight onto your cake. It really is that easy!
These squeeze bottle drips are suitable for beginners and professional bakers alike. They make things easier and cleaner and help you get smooth, even results. They also come in many different colours, so you can easily find the perfect fit for your theme, without the need to colour your ganache.
The Three Rules for a Perfect Drip Every Time
Getting the drip right comes down to three simple things. Get these right and your drip cake design will look neat and professional every time.
- Chill your cake first. A cold cake slows the drip and gives you better control. Without this, the drip can run straight down to the base.
- Get the temperature right. Your ganache or drip should feel slightly warm, around 30 degrees. Too hot can melt your buttercream, while too cold can make it look thick and uneven.
- Always do a test drip. Start on the back of the cake with one drip. If it runs too far, let your ganache cool a little longer. If it barely moves, warm it up for a few more seconds.
Drip Cake Ideas to Inspire You
Once your drip cake is ready, the fun really begins. There are so many easy ways to make it look extra special. Let’s see some of the ideas to try:
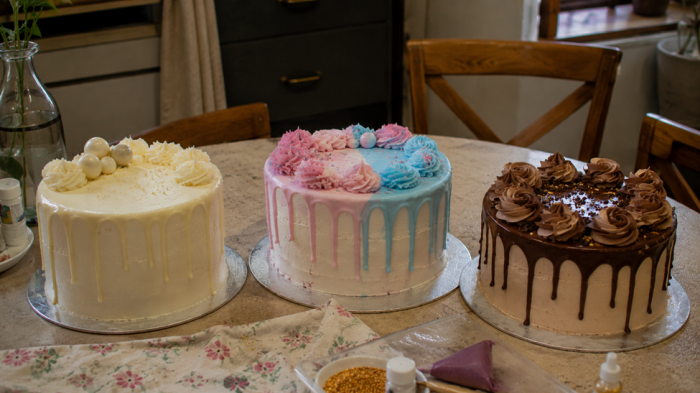
- Monochrome drip: Use one colour for your frosting, drip and decorations for a clean, modern look. All white or all black looks stunning.
- Two-tone drip: Why stick to one colour? Try two! Alternate them around the cake for a fun, playful finish. Perfect for birthdays!
- Drip with buttercream swirls: Add soft swirls or rosettes on top and let the drip flow around them. It looks so pretty and full.
- Sugarpaste decorations: Add flowers or shapes on top for a cute finish. You can even skip liquid drip and use cut-out drip shapes.
What Cake Decoration Equipment Do You Actually Need?
You do not need lots of tools to make a great drip cake. A few simple basics are enough to get started:
- Piping supplies like piping bags or squeeze bottles for neat and controlled drips
- A turntable to help you rotate the cake smoothly while working
- A palette knife or scraper to smooth your buttercream base
A drip icing cutter if you prefer a clean fondant drip instead of ganache
How to Make Drip Icing Look Its Best
You know how to make drip icing, you just want it to look smooth and bakery-perfect too? It’s simpler than you think! A few simple habits can have a huge impact. Add your drips one at a time rather than pouring it all at once. Sounds small, right? It really helps you control how each drip moves down the cake.
Why not play around with the drip lengths? Go for a mix. Some short, some medium and a few longer ones. Doesn’t that sound more fun? This trick will make your cake look more natural and attractive. And don’t forget the top! After you finish the sides, carefully smooth the rest of the drip on the top to bring the whole look together.
Ready to Give It a Go?
Making a drip cake is honestly one of the best things you can bake. Once you get the basics clear, it opens up so many creative options. Be it a classic chocolate drip cake, a pastel candy melt version or bold monochrome styling, the end results always look amazing.
Start with the basics, make sure your cake is well chilled and always test your drip first. Excited yet? Most of all have fun at every stage in the process. You may just surprise yourself with how amazing your cake turns out.
Happy baking!
Comments are closed here.