
The Classic Black Forest Cake Recipe That Never Gets Old
Has black forest cake always been one of your favourites?
People have been baking and sharing this cake for generations. While some cakes come and go, this one never seems to lose its place on the table.
Chocolate sponge, juicy cherries, fluffy cream, and chocolate on top. A black forest cake does not need much more than that. Every layer adds something different, which is what makes each slice so enjoyable.
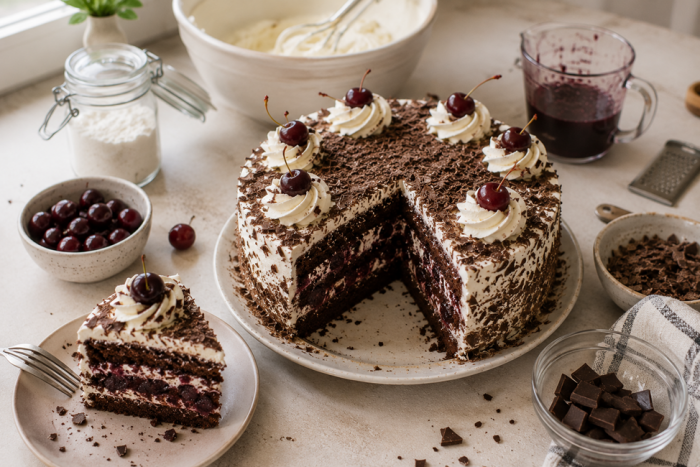
Thinking about making one yourself? Once the sponge, cream, and cherries are ready, the rest falls into place. From the chocolate sponge to the topping, dark chocolate callets help give this classic black forest cake its finishing touch.
What Is a Black Forest Cake?
Originating in Germany, a black forest cake is made by layering chocolate sponge with whipped cream, morello cherries, and Kirschwasser, a cherry spirit traditionally produced in the Black Forest region.
What many people do not realise is that the name comes from Schwarzwälder Kirschwasser, the cherry brandy traditionally used in the recipe, rather than the forest itself.
A traditional black forest cake keeps things fairly simple. Soft chocolate sponge, cherry cream filling, and chocolate decoration on top. Those three elements are what give the cake its familiar flavour and appearance.
Many people also know this classic dessert as a black forest gateau, especially in bakeries and traditional recipe collections. The name may vary, but the combination of chocolate, cream, and cherries remains the same.
Ingredients You Need
So, before knowing how to make black forest cake, and before you start making this black forest cake recipe, get all your ingredients ready first.
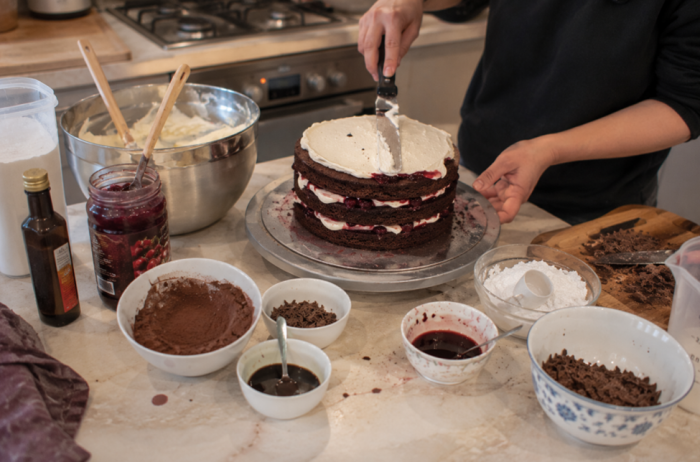
For the Chocolate Sponge
- 200g plain flour
- 60g cocoa powder
- 2 tsp baking powder
- Half tsp bicarbonate of soda
- 200g caster sugar
- 2 large eggs
- 200ml buttermilk
- 120ml neutral oil
- 1 tsp vanilla extract
- 150ml hot strong coffee
The cocoa powder plays a big role in the finished sponge. Using Callebaut cocoa powder gives the cake a darker colour and a richer chocolate flavour.
The coffee is there for the chocolate, not for a coffee taste. You will not really notice it in the finished cake, but it works well alongside the cocoa. If you do not have brewed coffee, coffee extract mixed with hot water works too.
For the Filling
- 600ml double cream
- 3 tbsp icing sugar
- 1 tsp vanilla bean paste
- 1 jar morello cherries in syrup
For the Cherry Soak
- 4 tbsp cherry syrup from the jar
- 2 tbsp kirsch (optional)
How to Make the Sponge?
Ready to start baking your black forest cake?
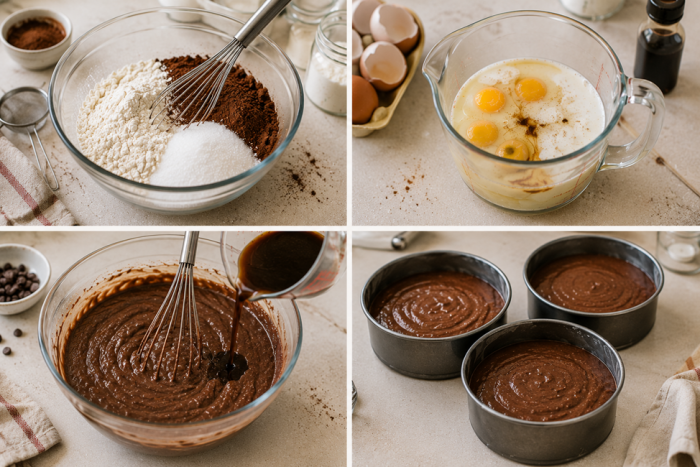
Preheat your oven to 170C fan and grease and line three 20cm round tins.
Add the flour, cocoa, baking powder, bicarbonate of soda, and sugar to a large bowl and mix them together. In a separate jug, combine the eggs, buttermilk, oil, and vanilla.
Pour the wet ingredients into the bowl and stir until everything comes together. Next, slowly add the hot coffee and mix until smooth. You will notice the batter is fairly loose, which is what you want here. That is how it should be for soft and light black forest cake layers.
Once the batter is ready, divide it between the tins and bake for 22 to 25 minutes. After 22 minutes, give the centre a quick check. You are looking for baked sponge rather than wet mixture.
Leave the sponges in the tins for a short while after baking. Trying to handle them while they are still warm can lead to cracks and broken edges.
Making the Cherry Cream
This filling is a big part of what makes a black forest cake what it is.
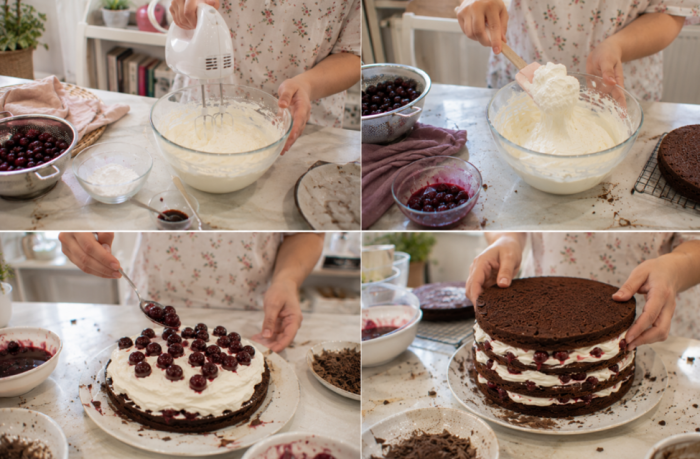
Whip the double cream with icing sugar and vanilla bean paste until it holds soft peaks. You want it light and smooth, not overly stiff.
A quick tip for the cherries? Leave them whole.
Cutting them in half releases extra juice, which can make the filling a bit messy. Whole cherries work better between the layers and help the cake keep its shape when sliced.
Bringing Everything Together
This is the stage where your black forest cake really starts to look like a cake.
Set the first sponge onto your cake board, then cover it with a generous amount of the cherry soak. Give it a minute to absorb before adding a layer of cream and a handful of whole cherries.
Now add the second sponge and repeat the process. Cherry soak, cream, then cherries.
Top everything with the last sponge and brush over the remaining cherry soak.
When you slice into the cake later, you want to see plenty of filling between the layers. Each layer should have plenty of cream alongside the cherries. It is a big part of what makes a classic black forest cake so enjoyable to eat.
Decorating Your Classic Black Forest Cake
Now for the part most people look forward t, decorating the classic black forest cake.
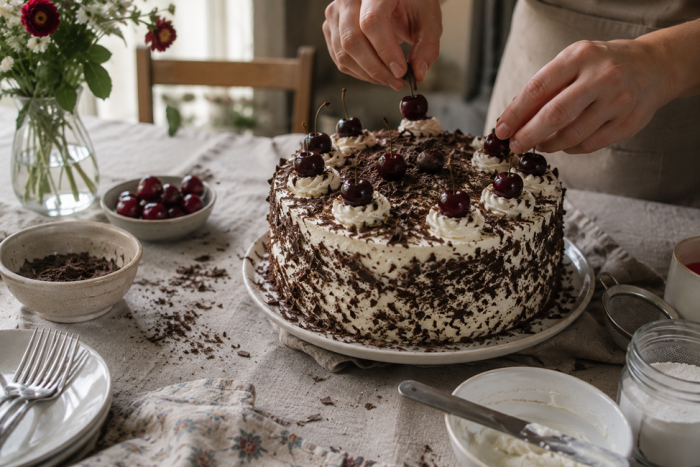
Now bring out the rest of the cream and fully cover the cake. Leave a little texture in the cream if you like. A black forest cake is known for its relaxed, rustic look, and that is part of its charm.
It is time for the chocolate, so add plenty of dark chocolate shavings across the top. Let a few fall down the sides as well. It adds texture and gives the cake its familiar look.
Now place whole cherries on top. The combination of chocolate, cream, and cherries is what makes a black forest birthday cake stand out on the table.
For a final touch, lightly dust the edges with vanilla flavoured icing sugar.
A few simple Cake decorating supplies are often all you need to turn a homemade black forest cake into something people cannot wait to slice into.
A Better Slice Starts Here
If you want the best result from your classic black forest cake, these tips are worth following.
- Keep the cream cold before whipping. Cream straight from the fridge works best here.
- Give the sponge time to cool before brushing on the cherry soak. A cooled sponge absorbs the soak more evenly and gives you a better texture in the finished cake.
- Want a little extra flavour? A few drops from your favourite flavourings and extracts, such as vanilla or almond, can work well in the cream.
- Once your black forest cake is assembled, place it in the fridge for at least an hour. The layers settle, and the slices look much cleaner when served.
Does It Keep Well?
It does, and many people feel it tastes even better the next day.
As the cake rests, the sponge takes in more of the cherry soak and the layers settle together. Keep your black forest cake covered in the fridge and it should stay fresh for up to two days.
In fact, a black forest gateau is often even better after a little time in the fridge. The sponge, cream, and cherries all come together beautifully, making every bite even more enjoyable.
If you are making a black forest birthday cake, baking the sponges a day earlier can save you time.
The Recipe That Stays
Some recipes are made once and forgotten. This black forest cake recipe is not one of them.
When you combine rich chocolate sponge, cherries, whipped cream, and plenty of chocolate on top, you get a cake that people are always happy to see on the table.
If you take your time with the layers and do not hold back on the filling, the result is a classic black forest cake that looks just as good as it tastes.
That is why this black forest cake has stayed popular for so many years. It is simple, familiar, and always a pleasure to share.
Comments are closed here.